Wednesday, May 27, 2009

Space Invaders Socks!!

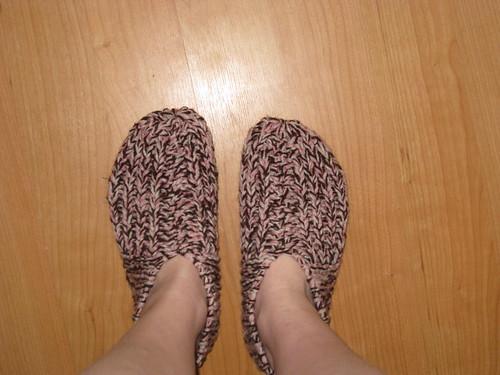
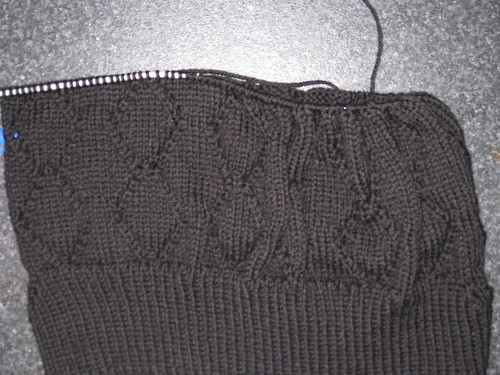
I am currently working on some Space Invaders socks for Neale. I had originally decided to make them using 3.25mm needles, but I would have only have been able to fit about 4 space invaders across the sock, so I have gone down to 3mm needles and I can fit 6 space invaders across. I have finished the ribbing and am onto my 3rd line of chart. I am doing one sock with space invaders and the other one with a high score. I think I will make the high score as Neale’s birthday (290385) I just have to see if it will fit! The only other problem that I have faced is that the sock with the high score on it is only on one side, so to carry the wool along I have sort of improvised with a 5 stitch diagonal pattern. Like this:

W B B B B W B B B B
B W B B B B W B B B
B B W B B B B W B B
B B B W B B B B W B
B B B B W B B B B W
W B B B B W B B B B
B W B B B B W B B B

W = White stitch
B = Black stitch

So I hope that it looks ok….

Oh and for the sock pattern, I actually used Elizabeth Bennett’s Perl Sock Program which was suggested to me on Ravelry. As these are my first EVER socks, so far its all pretty easy, but I always need to make it harder (such as adding charts! lol)

Can’t wait to see how they look!!


I haven’t updated this in a couple of weeks I think… although I have been so busy lately it seems as though weeks and weeks have passed and it’s only been about one!

I bought some new wool! Well, I haven’t actually stopped :-/ I spent about $75 at BWM, then I also bought some funky Sean Sheep yarn from Big W. I have also bought so many new circulars I feel like I’m just spending money all the time!!

However, I have now finished the baby blanket for Fi and Craig! Unfortunately it’s actually a bit smaller than it was originally as I was running out of cotton to finish the edging. But overall I have to say that I’m really happy with how it turned out by using the double strands and larger needles! It’s blocking atm, but I’ll post some pics up of it soon.

I also made Kobi a skull beanie! I LOVE this pattern!! So easy, quick and just awesome to do! And it turned out really well if I do say so myself!! Now I have to make Dags one with the aboriginal flag and Cru is still deciding on his design.

Thursday, May 7, 2009

Sexy Vesty - Almost Finished

Well, as I don't have Ravelry available to me at work anymore, looks like I will be updating my blog a bit more! lol

Last night I finished off the armhole shaping, cast off the 10sts for the actual armhole and began working on the left front piece. As of this morning I have no finished the left front piece and have made a start on the right front piece. I have to say that I am pretty happy with the mods in this one. I even tried the vest on this morning (praying that the sts wouldnt come off the needles) and it fit really well! The ribbing stretches right across my belly, but I'm hoping that once I get a chance to look in the mirror that it wont look too bad.

It currently has car hair in it, and I can't wait til I finish it so that I can get all of that pesky cat heair out of it!

This wook is really nice to work with. It's not itchy, its nice and thick and warm too! I'm so happy that Bendigo Woollen Mills bought out a 10ply in such lovely colours, because I have so many projects queued that call for 10ply!

Next on my project list however is a Skull and Cossbone beanie for my 5 year old nephew (that is when i do my next wool order!!) otherwise there is a cute sheep dog cushion I'm going to make to add to my 'hope chest' for future babies - mine or otherwise! lol!

*** btw - do you all like my cool progress bar on the side?! Special thanks to Bells for helping me with it! ***

Tuesday, May 5, 2009

Sexy Vesty Mods


This is my latest project! I have made a few mods to this, so that it will fit me. I hope that others can use this for them as well.

Size: Large(ish) - 42-44" bust

MODS: (these are the changes, work everything else as it states in the pattern)

Cast on 200sts - this creates 2 additional lace patterns on the front and back - 4 total. This also enables you to keep the pattern centered.

Work pattern for 13" (more or less as you desire

I made it so that all of my decreases for the v neck and arm holes were done as much as I could in the round, so below are my pattern notes for this. Please note that when it says K you are actually continuing on in the pattern (eg K1, K2tog, K174, SSK, K1 - all of this is worked to the pattern to keep the lace correct).

Begin Neck and Armhole Mods

Slip 45sts over and join wool 180sts

1st Row: K1, SSK, K174, K2tog, K1 (-2sts) 178sts
2nd Row: P
3rd Row: K1, SSK, K168, K2tog, K1 (-2sts) 176sts
4th Row: P
5th Row: K1, SSK, K162, K2tog, K1 (-2sts) 174sts
6th Row: P
7th Row: K1, SSK, K156, K2tog, K1 (-2sts) 172sts
8th Row: P


Begin Armhole Shaping

1st Row: K1, SSK, K37, Inc in next 2sts, K88, Inc in next 2 sts, K37, K2tog, K1 (+2sts) 174sts
2nd Row: P
3rd Row: K1, SSK, K37, Inc in next 2sts, K90, Inc in next 2 sts, K37, K2tog, K1 (+2sts) 176sts
4th Row: P
5th Row: K1, SSK, K37, Inc in next 2sts, K92, Inc in next 2 sts, K37, K2tog, K1 (+2sts) 178sts
6th Row: P
7th Row: K1, SSK, K37, Inc in next 2sts, K94, Inc in next 2 sts, K37, K2tog, K1 (+2sts) 180sts
8th Row: P
9th Row: K1, SSK, K37, Inc in next 2sts, K96, Inc in next 2 sts, K37, K2tog, K1 (+2sts) 182sts
10th Row: P
11th Row: K1, SSK, K33, Cast off 10sts, K90, Cast off 10 sts, K33, K2tog, K1 (-22sts) 160sts


Work Left Front

1st Row: P
2nd Row: K32, SSK, K1 (-1st) 34sts
3rd Row: P
4th Row: K31, SSK, K1 (-1st) 33sts
5th Row: P
6th Row: K30, SSK, K1 (-1st) 32sts
7th Row: P
8th Row: K29, SSK, K1 (-1st) 31sts
9th Row: P
10th Row: K28, SSK, K1 (-1st) 30sts
11th Row: P
12th Row: K27, SSK, K1 (-1st) 29sts
13th Row: P
14th Row: K26, SSK, K1 (-1st) 28sts
15th Row: P
16th Row: K25, SSK, K1 (-1st) 27sts
17th Row: P
18th Row: K24, SSK, K1 (-1st) 26sts
19th Row: P
20th Row: K23, SSK, K1 (-1st) 25sts
21st Row: P
22nd Row: K22, SSK, K1 (-1st) 24sts
23rd Row: P
24th Row: K21, SSK, K1 (-1st) 23sts
25th Row: P
26th Row: K20, SSK, K1 (-1st) 22sts
27th Row: P
28th Row: K19, SSK, K1 (-1st) 21sts
29th Row: P
30th Row: K18, SSK, K1 (-1st) 20sts
31st Row: P
32nd Row: K17, SSK, K1 (-1st) 19sts
33rd Row: P
34th Row: K16, SSK, K1 (-1st) 18sts
35th Row: P
36th Row: K15, SSK, K1 (-1st) 17sts
37th Row: P
38th Row: K14, SSK, K1 (-1st) 16sts
39th Row: P
40th Row: K13, SSK, K1 (-1st) 15sts

Continue in pattern until the armhole measures 8” finishing with a P row. Put the remaining sts onto a stitch holder (or piece of thread) for later


Work Right Front

Join wool to the right front 35sts

1st Row: P
2nd Row: K1, K2tog, K32 (-1st) 34sts
3rd Row: P
4th Row: K1, K2tog, K31 (-1st) 33sts
5th Row: P
6th Row: K1, K2tog, K30 (-1st) 32sts
7th Row: P
8th Row: K1, K2tog, K29 (-1st) 31sts
9th Row: P
10th Row: K1, K2tog, K28 (-1st) 30sts
11th Row: P
12th Row: K1, K2tog, K27 (-1st) 29sts
13th Row: P
14th Row: K1, K2tog, K26 (-1st) 28sts
15th Row: P
16th Row: K1, K2tog, K25 (-1st) 27sts
17th Row: P
18th Row: K1, K2tog, K24 (-1st) 26sts
19th Row: P
20th Row: K1, K2tog, K23 (-1st) 25sts
21st Row: P
22nd Row: K1, K2tog, K22 (-1st) 24sts
23rd Row: P
24th Row: K1, K2tog, K21 (-1st) 23sts
25th Row: P
26th Row: K1, K2tog, K20 (-1st) 22sts
27th Row: P
28th Row: K1, K2tog, K19 (-1st) 21sts
29th Row: P
30th Row: K1, K2tog, K18 (-1st) 20sts
31st Row: P
32nd Row: K1, K2tog, K17 (-1st) 19sts
33rd Row: P
34th Row: K1, K2tog, K16 (-1st) 18sts
35th Row: P
36th Row: K1, K2tog, K15 (-1st) 17sts
37th Row: P
38th Row: K1, K2tog, K14 (-1st) 16sts
39th Row: P
40th Row: K1, K2tog, K13 (-1st) 15sts

Continue in pattern until the armhole measures 9” finishing with a P row. Put the remaining sts onto a stitch holder (or piece of thread) for later.

Back

Work the back as stated in original pattern notes until you reach the part where you need to transfer the centre sts.


Left Shoulder
1st Row: K28sts, K2tog (-1st) 29sts (place the next 30sts onto st holder) turn work and continue on these 29sts

2nd Row: P2tog, P to end (-1st) 28sts

3rd Row: K26sts, K2tog (-1st) 27sts

4th Row: P2tog, P to end (-1st) 26sts

5th Row: K24sts, K2tog (-1st) 25sts

6th Row: P2tog, P to end (-1st) 24sts

7th Row: K22sts, K2tog (-1st) 23sts

8th Row: P2tog, P to end (-1st) 22sts

9th Row: K20sts, K2tog (-1st) 21sts

10th Row: P2tog, P to end (-1st) 20sts

11th Row: K18sts, K2tog (-1st) 19sts

12th Row: P2tog, P to end (-1st) 18sts

13th Row: K16sts, K2tog (-1st) 17sts

14th Row: P2tog, P to end (-1st) 16sts

15th Row:K14sts, K2tog (-1st) 15sts

16th Row: P


Right Shoulder

Join wool to remaining 30sts

1st Row: K2tog, K to end (-1st) 29sts - turn work and continue on these 29sts
2nd Row: P27sts, K2tog (-1st) 28sts
3rd Row: K2tog, P to end (-1st) 27sts
4th Row: P25sts, K2tog (-1st) 26sts
5th Row: K2tog, P to end (-1st) 25sts
6th Row: P23sts, K2tog (-1st) 24sts
7th Row: K2tog, P to end (-1st) 23sts
8th Row: P21sts, K2tog (-1st) 22sts
9th Row: K2tog, P to end (-1st) 21sts
10th Row: P19sts, K2tog (-1st) 20sts
11th Row: K2tog, P to end (-1st) 19sts
12th Row: P17sts, K2tog (-1st) 18sts
13th Row: K2tog, P to end (-1st) 17sts
14th Row:P15sts, K2tog (-1st) 16sts
15th Row: K2tog, P to end (-1st) 15sts


I also reccommend that when working on the armhole ribbing to cast off with larger needles :)


I really hope this all helps and makes sense. Please comment here or on Ravelry if you need any clarification.

Sexy Vesty while being blocked

Update!

Ok, So it's been a while since I have updated, and I would love to add some piccies, but will have to add them in later as my work sucks and i can't acess my flicker account (or even ravelry anymore!!)

So, I have made:

Bunny Ears
These were made for a work Easter competition - which we didnt win lol

Slippers
Like the ones Dorothy used to make for us as kids, but I used 3 strands of 8 play wool and bigger needles so that I didnt have to knit so much.


Argyle Vest
I have started this, and it takes a while to get throug, but I am about halfway to the V Neck shaping of the front and really like the way its turning out - just wish it wouldnt take so long!


Cotton Spiral Baby Blanket
I have made this for Fi & Craig's Baby. I have almost finished, just need to do the crocheted edging, although that's gonna take forever. But it looks quite cute and its really soft! Then it just needs to be blocked.


Blueberry Shetland Shorty
I have made another one! This one has more mods to my original mods and i love this one so much! If I make another one, these are the mods that I would use!


Sexy Vesty
I am working on this one now! Its so fast to knit!! I have made a few mods as its a larger size - but I will post these in a separate post.


*phew* That's a lot of projects!!